| Device |
| Einstein™: CS version 5.0 and higher |
| Einstein Pro XL™: CS version 5.0 and higher |
A compensation mask is used to correct the possible unevenness of the projector power across the build envelope.
Required equipment:
- USB light sensor
- UV safety goggles
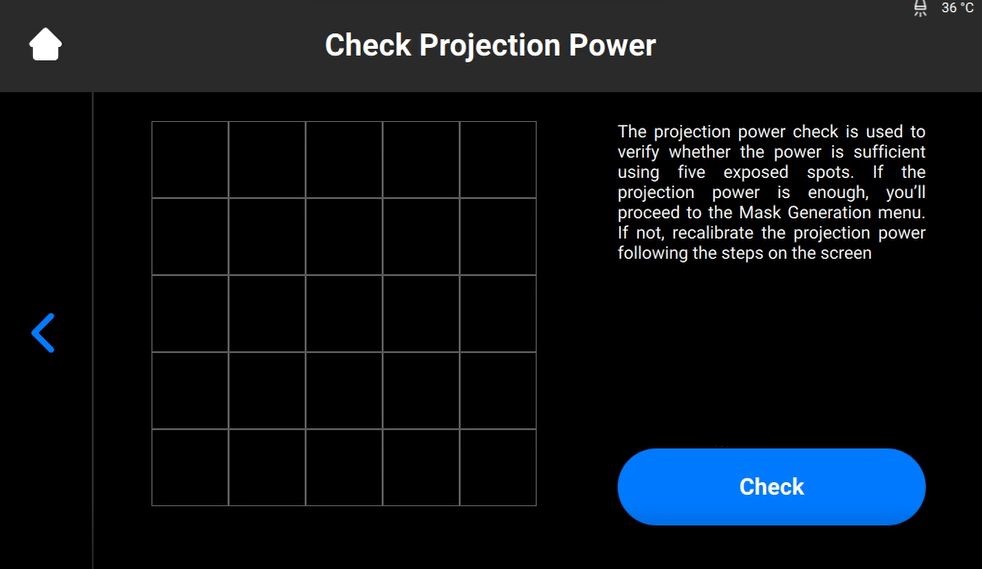
Check Projection Power
1. Insert the empty and clean material tray into the material tray holder.
2. Navigate to Settings > Move & Calibration > Mask Generation.
→ The following message appears.
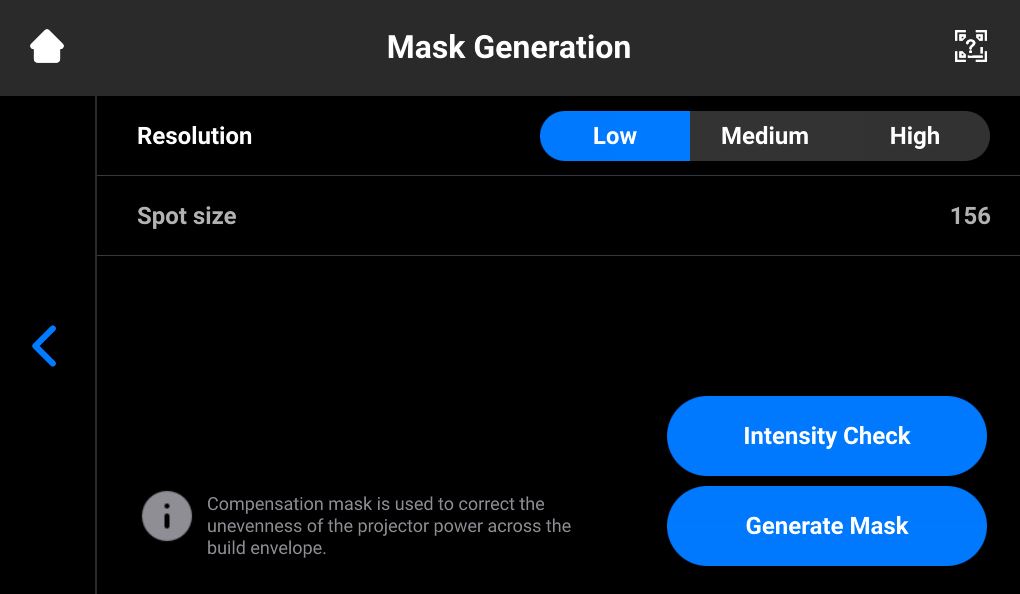
3. Select a resolution (Low, Medium, or High) in the Resolution field.
4. Select Generate.
→ The following screen appears.
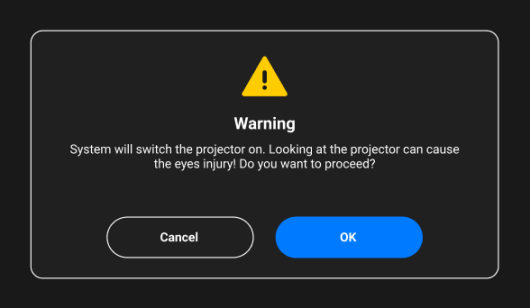
5. Make sure you have the UV safety goggles on and select OK to proceed.
→ The screen appears allowing to perform the projection power check.
6. Select Check to proceed.
→ The first spot is projected onto the material tray.
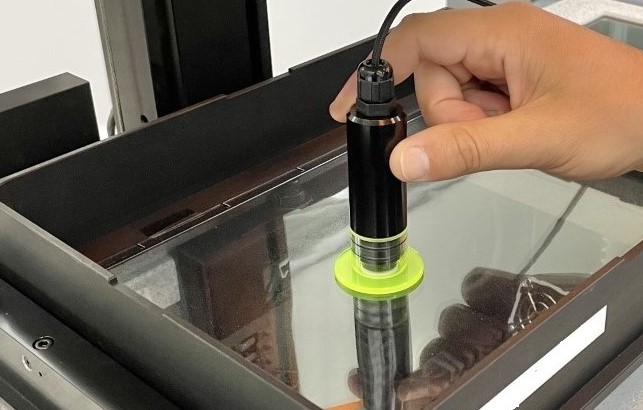
7. Place the USB light sensor in the center of the calibration spot projected onto a material tray and select Next to check the projection power.
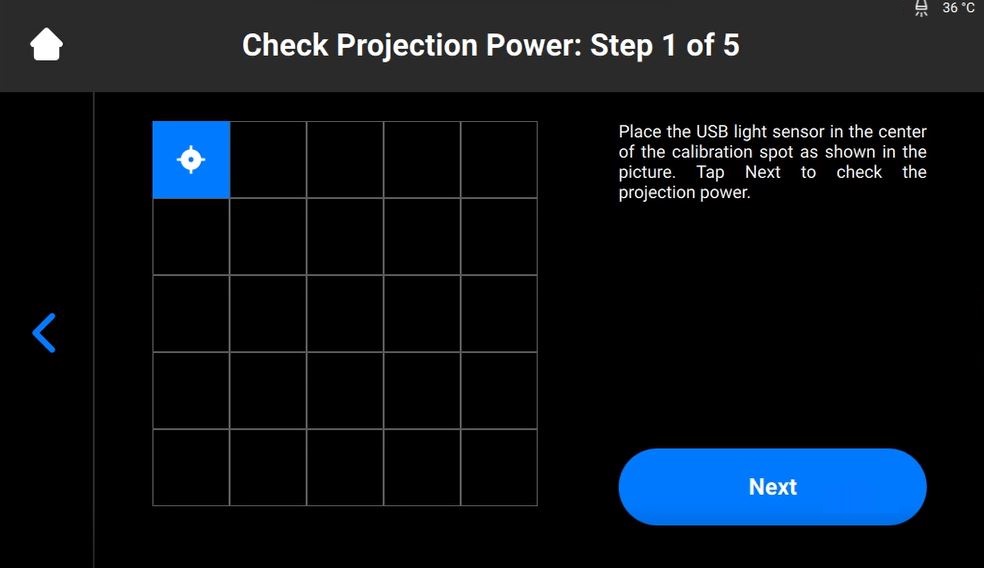
8. Repeat step 7 for the remaining projected spots and select Next.
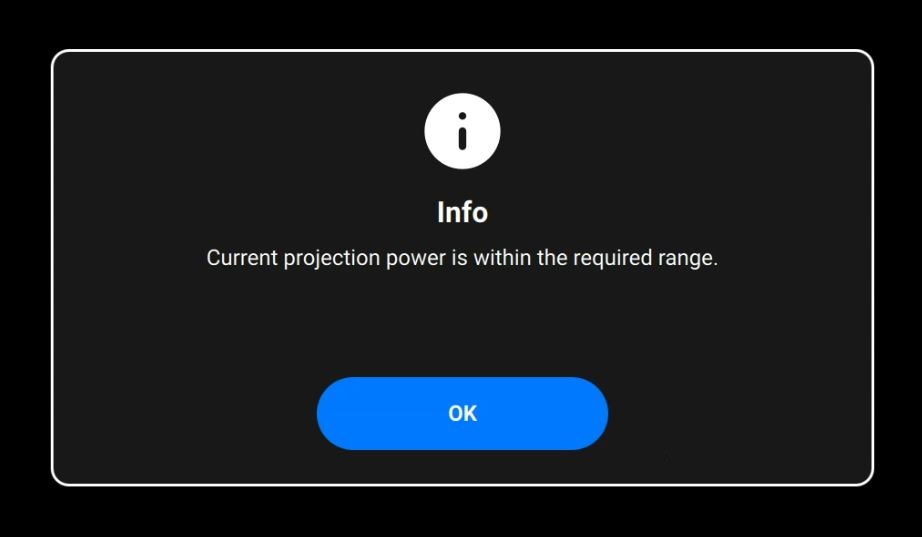
9. On the screen that appears, select OK to proceed to the compensation mask generation.
Generate Mask
The following screen appears if the projection power check was successful:
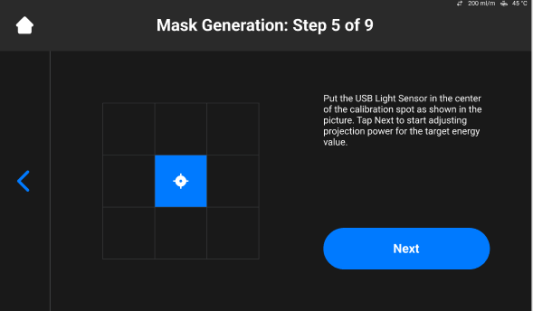
1. Place the USB light sensor in the center of the light spot that is projected onto the material tray and select Next on the printer screen to start the adjustment.
→ The Next button becomes the Pause button.
2. Repeat step 1 for each of the remaining boxes.
→ The following screen appears.
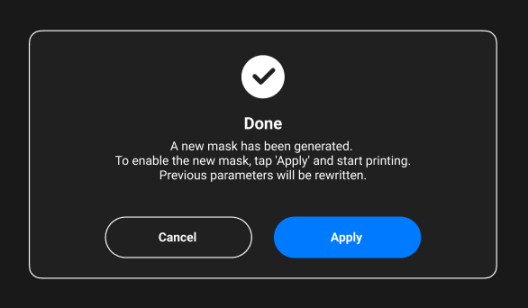
3. Select Apply on the confirmation screen to save the newly generated mask and proceed to work with the printer.
→ The newly generated mask has been saved.
Delete Compensation Mask
1. Navigate to Settings > Move & Calibration > Active Mask.
→ The following screen displays.
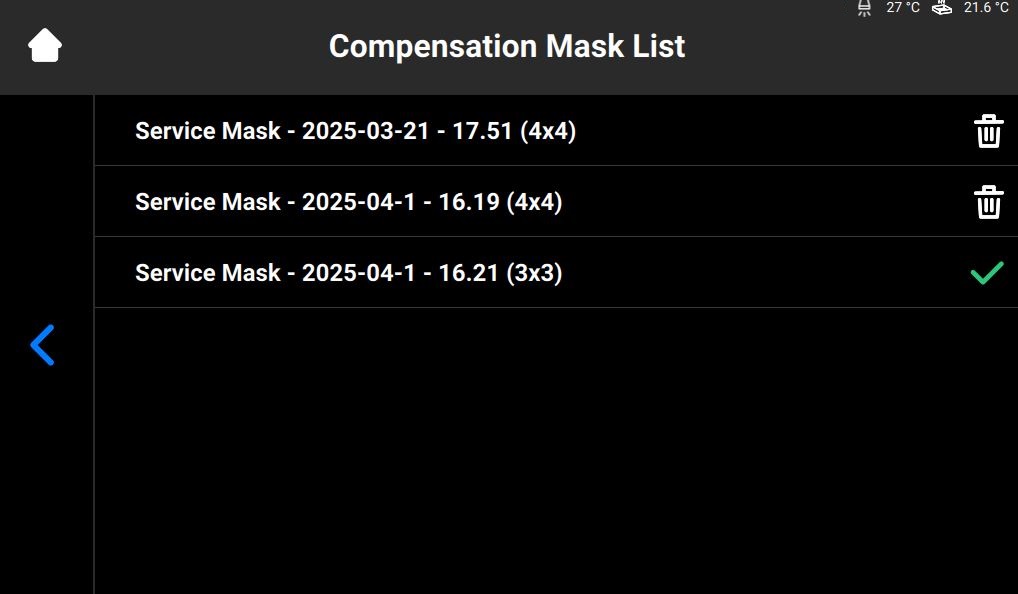
2. Locate the trash icon next to each inactive mask.
3. Select the trash icon of the mask you want to delete.
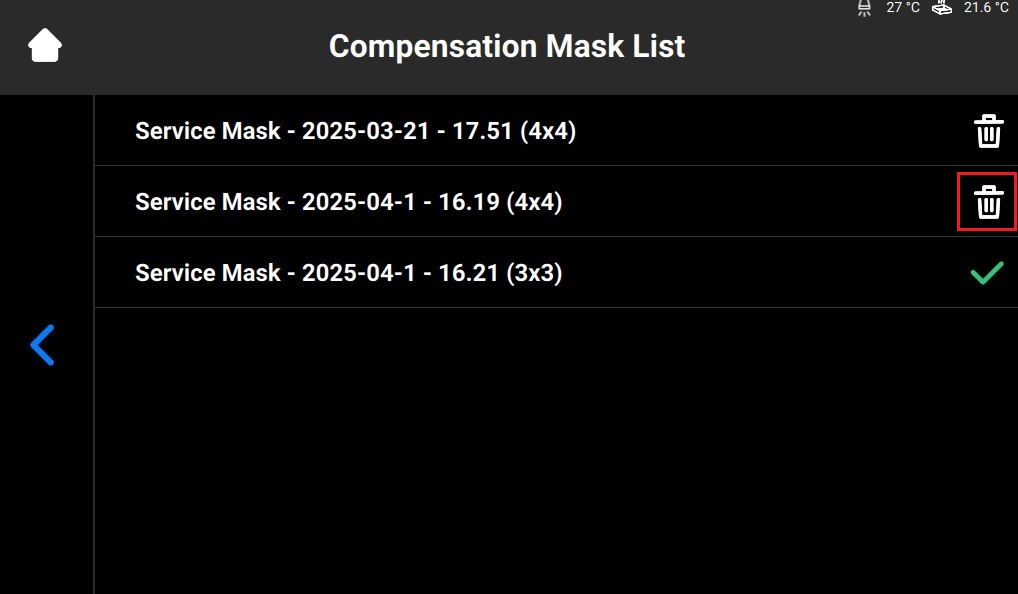
→ The system displays a warning message:
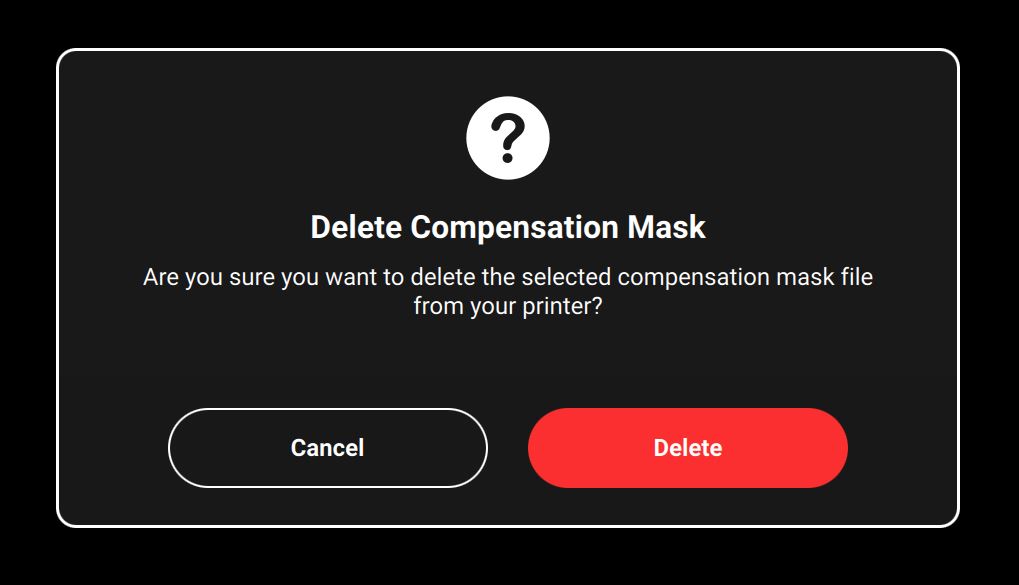
4. Select Delete.
→ The system removes the selected mask from the list.